Jeep Cherokee (XJ): Park rod and pawl. Transmission throttle cable. Oil pump seal
REMOVAL (1) Remove valve body as outlined in this section.
(2) Remove bolts attaching park rod bracket to
case (Fig. 88).
(3) Remove park rod from manual valve shaft sector
(Fig. 89).
(4) Remove park rod.
1 - PARK ROD BRACKET
1 - SHIFT SECTOR (5) Remove park pawl, pin and spring (Fig. 90). INSTALLATION (1) Examine park rod, pawl, pin and spring.
Replace any component that is worn or damaged.
(2) Install pawl in case. Insert pin and install spring.
Be sure spring is positioned as shown in Figure 35.
(3) Install park rod and bracket (Fig. 88). Tighten
bracket bolts to 10 N·m (7 ft. lbs.) torque.
(4) Install valve body, oil screen and oil pan. REMOVAL (1) In engine compartment, disconnect cable from
throttle linkage. Then compress cable mounting ears
and remove cable from engine bracket (Fig. 91).
(2) Raise vehicle.
(3) Remove transmission oil pan.
(4) Disengage cable from throttle valve cam (Fig.
92).
(5) Remove cable bracket bolt and remove cable
and bracket from case (Fig. 93).
(6) Remove and discard cable seal.
1 - SPRING
1 - THROTTLE CABLE
1 - THROTTLE CABLE
1 - THROTTLE CABLE INSTALLATION (1) Lubricate and install new seal on cable.
(2) Insert cable in transmission case.
(3) Attach cable to throttle cam (Fig. 92).
(4) Install cable bracket on case and tighten
attaching bolt to 10 N·m (7 ft. lbs.) torque (Fig. 93).
(5) Install pan and tighten pan bolts to 7 N·m (65
in. lbs.) torque.
(6) Install new gasket on oil pan drain plug.
Install and tighten plug to 20 N·m (15 ft. lbs.) torque.
(7) Connect cable to engine bracket and throttle
linkage.
(8) Fill transmission with Mopart Dexron/Mercon
IIE.
(9) Adjust the cable as described in cable adjustment
procedure. REMOVAL (1) Remove converter.
(2) Remove old seal. Use blunt punch to collapse
seal and pry seal out of pump housing. Do not
scratch or damage seal bore. INSTALLATION (1) Lubricate lip of new seal with transmission
fluid and install seal in pump with tool 7549 (Fig.
94).
1 - PUMP SEALER INSTALLER (2) Lubricate converter drive hub with transmission
fluid.
(3) Align and install converter in oil pump.Park rod and pawl
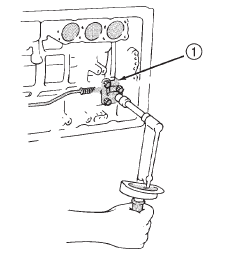
Fig. 88 Removing/Installing Park Rod Bracket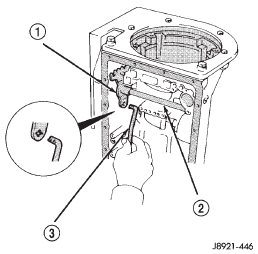
Fig. 89 Removing/Installing Park Rod
2 - MANUAL VALVE SHAFT
3 - PARK RODTransmission throttle cable
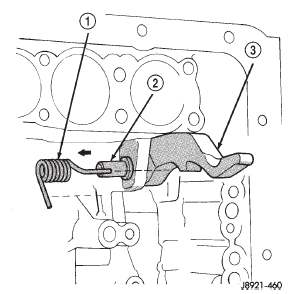
Fig. 90 Removing/Installing Park Pawl, Pin And Spring
2 - PIN
3 - PARK PAWL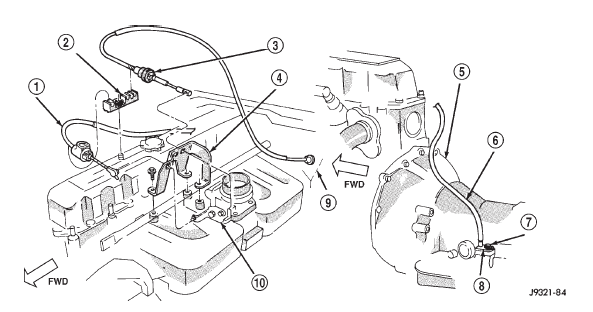
Fig. 91 Transmission Throttle Cable Attachment
2 - CABLE GUIDE
3 - ACCELERATOR CABLE
4 - CABLE ENGINE BRACKET
5 - CONVERTER HOUSING
6 - THROTTLE CABLE
7 - CABLE RETAINER SCREW
8 - CABLE BRACKET
9 - DASH PANEL
10 - THROTTLE BODY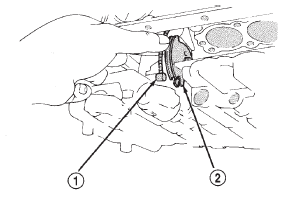
Fig. 92 Removing/Installing Transmission Throttle Cable
2 - CABLE BRACKET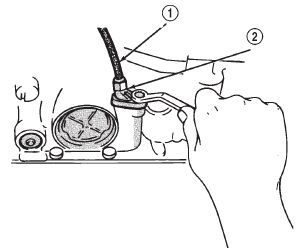
Fig. 93 Removing/Installing Transmission Throttle Cable And Bracket
2 - CABLE BRACKETOil pump seal
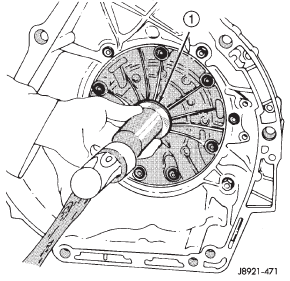
Fig. 94 Installing Oil Pump Seal
 Manual valve shaft seal. Accumulator pistons and springs. Second coast brake servo

Other materials:
Air Bag System Components. Advanced Front Air Bags. Advanced Front Air Bag Features
Air Bag System Components
Your vehicle may be equipped with the following air bag
system components:
Occupant Restraint Controller (ORC)
Air Bag Warning Light
Steering Wheel and Column
Instrument Panel
Knee Impact Bolsters
Advanced Front Air Bags
Supplemental Side Air Bags
Supple ...