Jeep Cherokee (XJ): Body side molding. Rear fender flare. Quarter window applique
REMOVAL (1) Loosen the body side molding (Fig. 60) with a
heat gun.
(2) Lift edge of molding with a putty knife and
peel molding from body panel. Apply heat to any
location where the molding remains adhered to a
panel.
(3) Remove the adhesive from the body panel with
Mopar Super Clean solvent or equivalent.
(4) If the original molding will be installed, also
remove all adhesive from it. INSTALLATION (1) If the original molding will be installed, apply
3M 5344 double-sided tape on the molding.
(2) For vertical alignment, use masking tape or a
string as reference.
(3) Remove the backing from the tape, align the
molding and position it on the body panel. REMOVAL (1) Remove the screw attaching the lower part of
flare to the bottom of the fender.
(2) Remove the nuts attaching the fender flare
retainer to the wheelhouse liner (Fig. 61).
(3) Separate the fender flare and retainer from the
fender.
1 - CENTER RETAINER INSTALLATION (1) Position the fender flare and retainer on the
fender.
(2) Install the nuts attaching the fender flare and
retainer to the wheelhouse liner.
(3) Install the screw attaching the lower part of
flare to the bottom of the fender. REMOVAL (1) Remove the liftgate pillar trim.
(2) Remove nuts from inside vehicle (Fig. 62).
(3) Using a trim sick or equivalent, carefully pry
the applique the from panel. INSTALLATION (1) Position the replacement applique the on panel
and install the nuts.
(2) Install the liftgate pillar trim.
1 - VEHICLE ROOFBody side molding
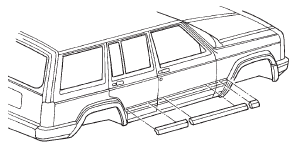
Fig. 60 Body Side Molding-4-Door
(4) Press the molding onto the body panel with a
roller or hand pressure.Rear fender flare
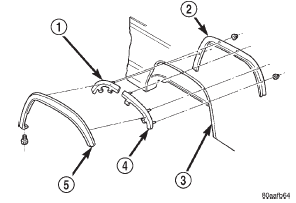
Fig. 61 Fender Flare
2 - WHEELHOUSE LINER
3 - BODY
4 - REAR RETAINER
5 - FENDER FLAREQuarter window applique
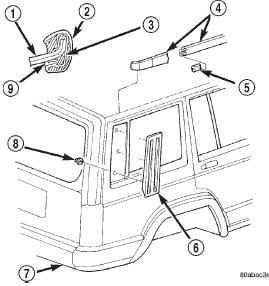
Fig. 62 Quarter Window Applique and Drip Molding
2 - DRIP MOLDING
3 - DRIP MOLDING CLIP
4 - DRIP MOLDING
5 - CLIP
6 - QUARTER WINDOW APPLIQUE
7 - VEHICLE BODY
8 - NUT
9 - SEALANT
 Rear door weatherstrip. Rear door window regulator. Rear door window glass
 Drip rail molding. Luggage rack. Air exhaust grille
Other materials:
Heated steering wheel
The steering wheel contains a heating element that helps
warm your hands in cold weather. The heated steering
wheel has only one temperature setting. Once the heated
steering wheel has been turned on it can operate for up to
120 minutes before automatically shutting off. The heated steering whee ...