Jeep Cherokee (XJ): Front door opening secondary weatherstrip. Front door glass exterior molding. Front door window regulator
REMOVAL The front door opening secondary weatherstrip is
attached to the A-pillar with adhesive tape (Fig. 33).
(1) Using a heat gun, heat the weatherstrip and
slowly peel the weatherstrip from the A-pillar
INSTALLATION (1) Clean the contact surface on the A-pillar.
(2) Remove the carrier backing and position the
weatherstrip on the A-pillar. Press into place. REMOVAL (1) Open the window completely.
(2) Remove the outer belt weatherstrip.
(3) Pry and pull the molding sections from the
door panel flange (Fig. 35).
1 - UPPER MOLDING INSTALLATION (1) Start at the forward end of the upper molding,
force the molding onto the door panel and continue
rearward until it is completely seated on the flange.
(2) Mate the rear molding with the upper molding
and force the molding edge inward.
(3) Continue pressing and moving downward to
complete the installation.
(4) Install the outer belt weatherstrip. REMOVAL (1) Remove the door trim panel.
(2) Remove the waterdam.
(3) Remove the window glass (4) Loosen the bolts attaching the regulator to the
inner door panel (Fig. 36) and (Fig. 37) as applicable.
(5) Lift the regulator upward to release it from the
key hole slots and remove it through the access hole
in the door inner panel.
1 - FRONT DOOR INSTALLATION
1 - FRONT DOOR (1) Position the regulator in the door and align
with key hole slots.
(2) Attach the regulator to door inner panel with
bolts (Fig. 38).
(3) Install the window glass
(4) Install the waterdam.
(5) Install the trim panel.
1 - GLASSFront door opening secondary
weatherstrip
Front door glass exterior molding
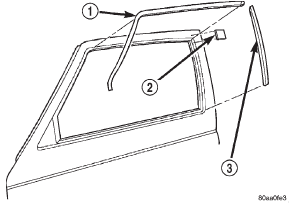
Fig. 35 Front Door Glass Exterior Molding
2 - SHIM
3 - REAR MOLDINGFront door window regulator
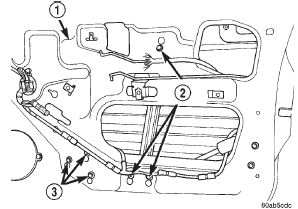
Fig. 36 Power Window Regulator
2 - LOOSEN BOLTS
3 - LOOSEN NUTS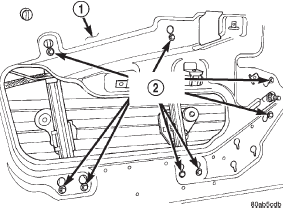
Fig. 37 Manual Window Regulator
2 - LOOSEN BOLTS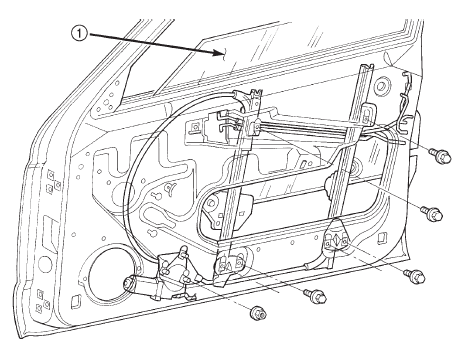
Fig. 38 Front Door Regulator

 Front door spacer blocks-twodoor
vehicles. Front door glass. Rear door trim panel
Front door spacer blocks-twodoor
vehicles. Front door glass. Rear door trim panel
Other materials:
Headlamp switch. Instrument cluster. Instrument cluster components
Headlamp switch
WARNING: ON VEHICLES EQUIPPED WITH AIRBAGS,
REFER TO GROUP 8M - PASSIVE
RESTRAINT SYSTEMS BEFORE ATTEMPTING ANY
STEERING WHEEL, STEERING COLUMN, OR
INSTRUMENT PANEL COMPONENT DIAGNOSIS OR
SERVICE. FAILURE TO TAKE THE PROPER PRECAUTIONS
COULD RESULT IN ACCIDENTAL AIRBAG
DEPLOYM ...